Troubleshooting Common Issues With 3-Cavity Connectors
A 3-cavity connector is crucial for ensuring secure and efficient electrical connections, but even small failures can lead to system malfunction or downtime. This guide will help you with troubleshooting common issues with 3-cavity connectors to keep your system running smoothly.
By the end of this post, you will have a clear understanding of potential problems, their root causes, and actionable solutions to avoid future setbacks.
Understanding the Basics of 3-Cavity Connectors
Before addressing issues, it is essential to understand the components of a 3-pin connector. These connectors typically feature three contact points designed for transmitting signals or power between different components within an electrical system. They are widely used in automotive, aerospace, and machinery industries due to their efficiency and compact size.
The design of these connectors enables secure physical and electrical connections, even in harsh environments. However, improper use or maintenance can lead to complications such as connection failures, misalignments, and contact degradation. Quickly identifying and solving such issues is key to preserving system performance.
Identifying Connection Faults
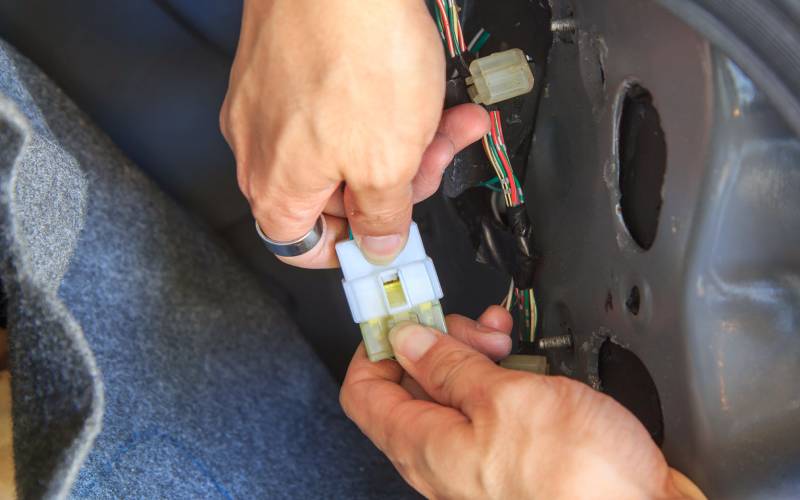
One of the most common issues with 3-cavity connectors is connection faults, which may arise due to loose contacts or improper engagement. Faulty connections can result in signal loss, intermittent power flow, or complete system failure.
To troubleshoot connection faults, visually inspect the connector and its contacts. Look for signs of misalignment or physical damage. A common cause of loose connections is improper mating, where the male and female ends of the connector do not fully align during installation. Ensure that the connector is fully seated by applying even pressure when securing the mating parts.
Additionally, always verify the integrity of the wiring leading to the connector. A damaged or frayed wire can mimic the effects of connection faults. Regular inspections and proactive maintenance can minimize the likelihood of these issues causing downtime.

Addressing Wear and Tear
Regular usage and exposure to environmental factors can lead to wear and tear in 3-cavity connectors. Over time, contact pins may become worn, corroded, or bent, resulting in reduced conductivity and inefficient performance.
Corrosion commonly occurs when connectors are used in environments with high humidity or chemical exposure. Remove the connector and clean the contact points using a suitable contact cleaner to address this issue. Avoid abrasive materials that could further damage the pins.
If contacts are bent or excessively worn, replacement is the most effective solution. Use compatible parts specifically designed for your connector type to avoid further issues. Incorporating dust caps or seals can also protect connectors from exposure to dust and moisture, extending their life span.
Managing Temperature-Related Failures
High operating temperatures can significantly impact the performance of a 3-cavity connector. Prolonged exposure to heat can degrade insulation materials, weaken the housing structure, and reduce the effectiveness of the contact points.
To mitigate temperature-related issues, assess the thermal resistance of the connectors in use. Manufacturers often specify a temperature range for optimal operation. Ensure your connectors are installed in environments that fall within this range.
Insulation failure due to heat often requires immediate replacement. Consider upgrading to high-temperature-resistant connectors if your system operates in extreme conditions. Additionally, you can minimize heat buildup by enhancing the ventilation and cooling mechanisms close to connectors.
Ensuring Proper Installation Practices
Improper installation practices are another leading cause of issues with 3-cavity connectors. Misaligned or improperly crimped wires often lead to inefficiencies or signal interference within the system.
When installing connectors, refer to the manufacturer’s guidelines for crimping terminals, as improper crimping can cause weak connections or broken wires. Use the correct tools for assembly and ensure that wires are firmly secured within the terminals. High-quality crimping machines designed specifically for 3-cavity connectors can minimize manual errors.
Double-check that the connector housing is properly latched or secured into its mounting surface. A common installation oversight includes failure to align guide keys, resulting in incomplete mating. Correcting these practices can prevent future operational issues.
Resolving Overloading Problems
Overloading is a critical problem that can lead to damage or failure in 3-cavity connectors. This occurs when the electrical load exceeds the connector’s rated capacity, causing overheating, damage to contact points, and potential fire hazards.
To prevent overloading, always understand the current and voltage limits of your 3-cavity connector. Ensure the power requirements of the connected devices do not exceed these thresholds. Use circuit protection devices, such as fuses or circuit breakers, to guard against accidental overloads.
If overloading has already caused damage, replace the affected connector and assess all downstream components for potential harm. Upgrading to connectors with higher power ratings may be necessary if your system often operates near its maximum capacity.
Identifying and Resolving Signal Interference
Signal interference can lead to distorted or disrupted data transmission, impacting the system's overall performance. Shielding and grounding are essential; implementing proper shielding techniques and grounding practices can help minimize electromagnetic interference (EMI) and radio frequency interference (RFI).
Ensure that cables are properly shielded and grounded to mitigate signal disruptions. Separating power and signal lines is also important to avoid potential electromagnetic coupling, as crossing or running these lines in close proximity can introduce unwanted noise and interference into the signal path.
Choosing high-quality connectors is another key strategy, as they are designed to minimize signal interference. Consider connectors with built-in shielding or effective noise reduction mechanisms. Proper cable management is equally important. Arranging and securing cables in a neat and organized manner can help avoid crosstalk and interference. Using cable ties, clips, or conduits can prevent cables from crossing or tangling with each other.
By implementing these measures, you can significantly reduce the risk of signal interference and ensure optimal performance and reliability of your system. A proactive approach to identifying and resolving signal interference is key to maintaining smooth, uninterrupted operations.
Maintaining Regular Inspections
Preventing issues with 3-cavity connectors starts with adopting a proactive approach to maintenance. Neglecting regular inspections can allow minor problems to escalate, leading to system inefficiencies and failures.
Establish a maintenance routine that includes visual inspections, cleaning, and testing. Look for signs of corrosion, physical damage, or wear. Remove debris and contaminants using non-conductive cleaning agents, which can cause short circuits over time.
Periodically testing the resistance of your connectors ensures all connections maintain their integrity. Use tools such as multimeters or specialized test kits to identify weak points in the circuit.
Training your staff on proper handling and inspection procedures will also contribute to maintaining the longevity and efficiency of your connectors.
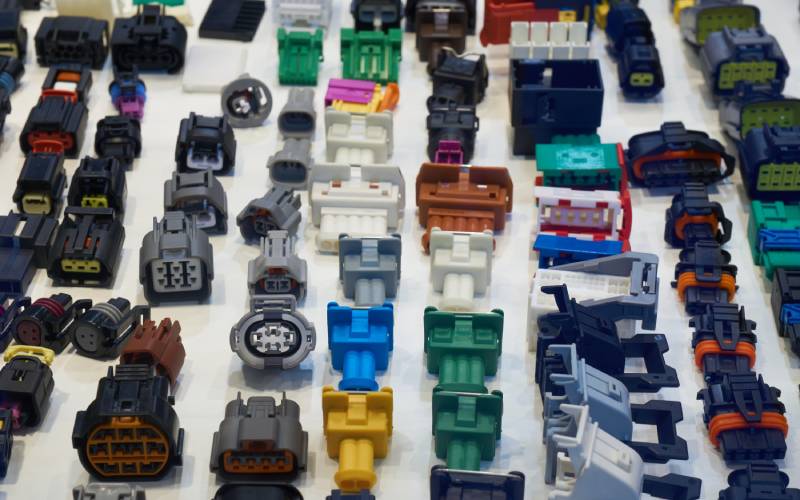
Managing Compatibility Issues
Using incompatible components with 3-cavity connectors is a frequent source of trouble in system operations. Mismatched connectors or wiring leads to loss of functionality, signal degradation, and connection difficulty.
Before integration, verify that all connectors and cables belong to the same compatible series. Pay attention to pin configurations, current ratings, and wire gauges when pairing components with your connectors.
If compatibility issues arise, disassemble the affected components and replace them with suitable alternatives. Some manufacturers provide cross-reference charts to help determine which connectors are compatible with specific systems, reducing guesswork and preventing installation errors.
Final Steps To Ensure Optimal Performance
Troubleshooting common issues with 3-cavity connectors requires meticulous attention to detail and adherence to best practices. Stay proactive by keeping up with regular maintenance, adhering to installation guidelines, and investing in high-quality components.
By promptly addressing issues such as connection faults, wear and tear, and thermal challenges, you can ensure the reliability and efficiency of your entire system. High-performing connectors lead to high-performing operations, so don’t overlook the small details.
If recurring issues persist, consult industry experts to design a tailored connector solution. Implement upgrades or make adjustments as necessary to futureproof your operations.